
Fill Any Shape with Personalized Text
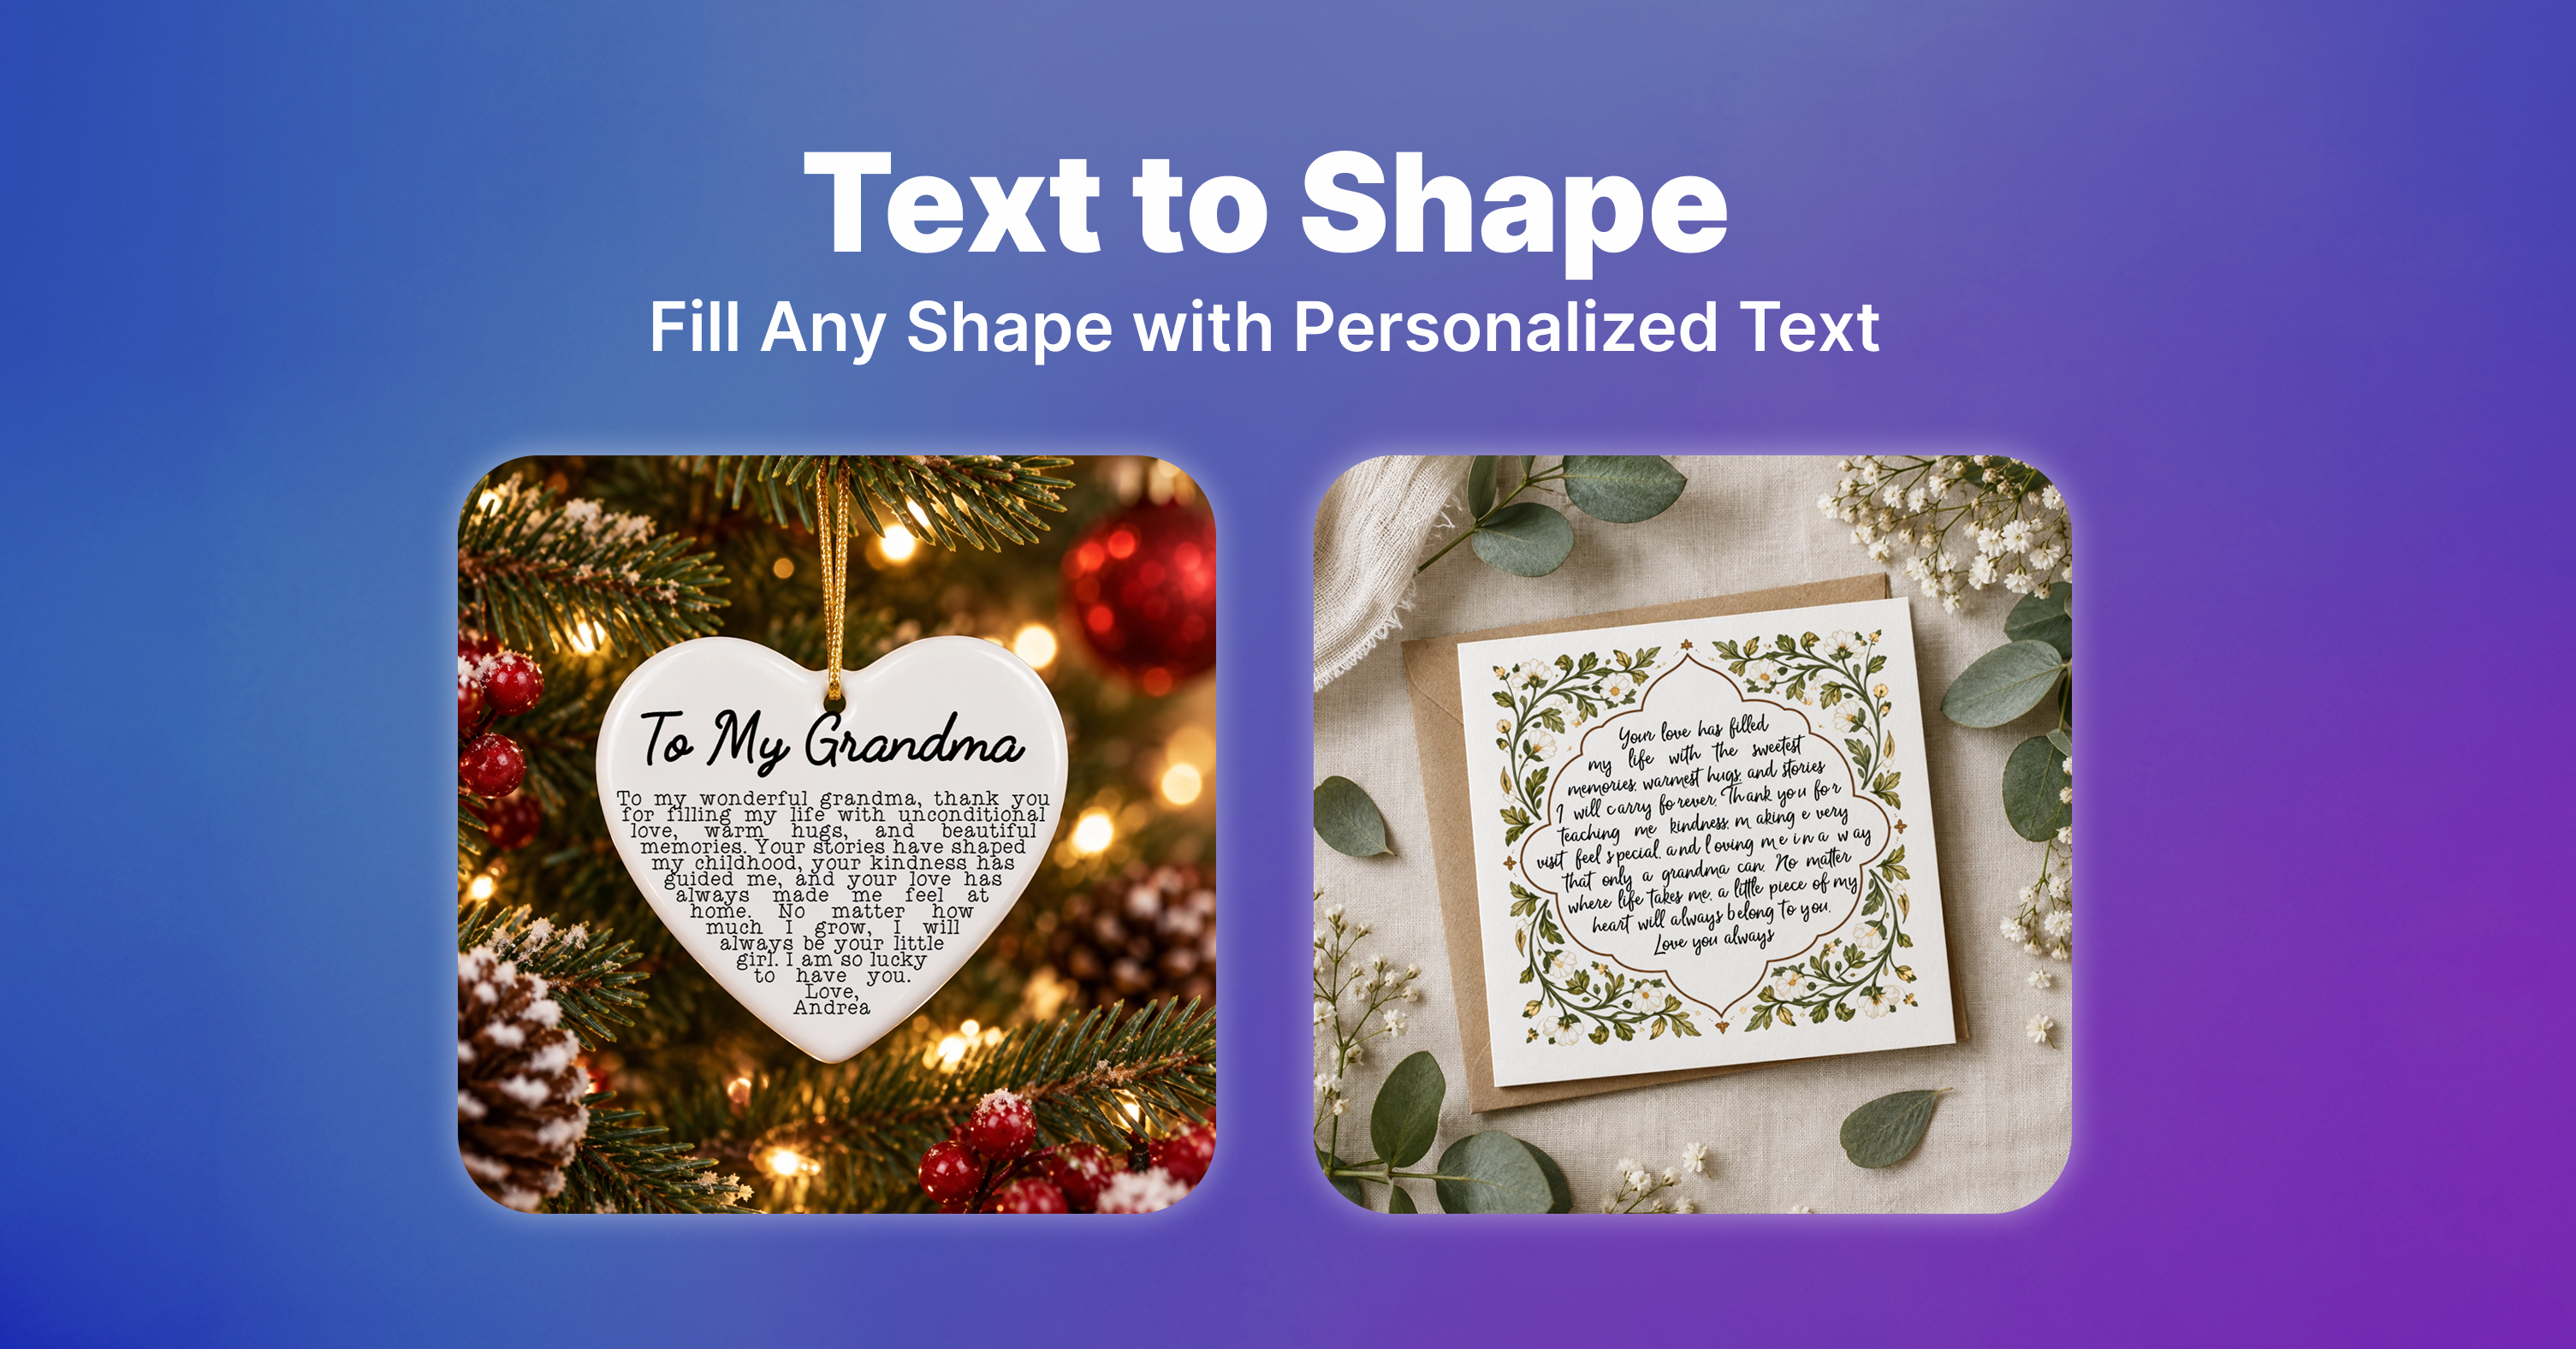
Create unique text designs that automatically fill a shape, whether pixel-based or vector. Customize every detail, including fonts, character settings, fill colors, outlines, shadows, and prefixes or suffixes. Choose your shape by uploading your own or selecting one from Customily’s Image or Vector Library.
Perfect for: Personalized gifts featuring meaningful messages, or heartfelt notes that fill shapes like hearts, stars, and more. Offer more creative personalization options to help your products stand out and attract shoppers looking for unique, meaningful gifts.
How to Set It Up-
In Design Studio, add the Text to Shape element to your design.
-
Customize your text settings, including fonts, min/max font size, colors, outlines, and more.
-
Choose your shape by uploading your own, using a Customily shape, or selecting an image or vector from the libraries.
-
That's it! You're ready to go.
Your shoppers will see a text area where they can enter their own special message, which will automatically fill the selected shape, making it easy to offer distinctive, personalized products without manually designing each variation.
Built-in Fallback for Face Cutout & Remove Background
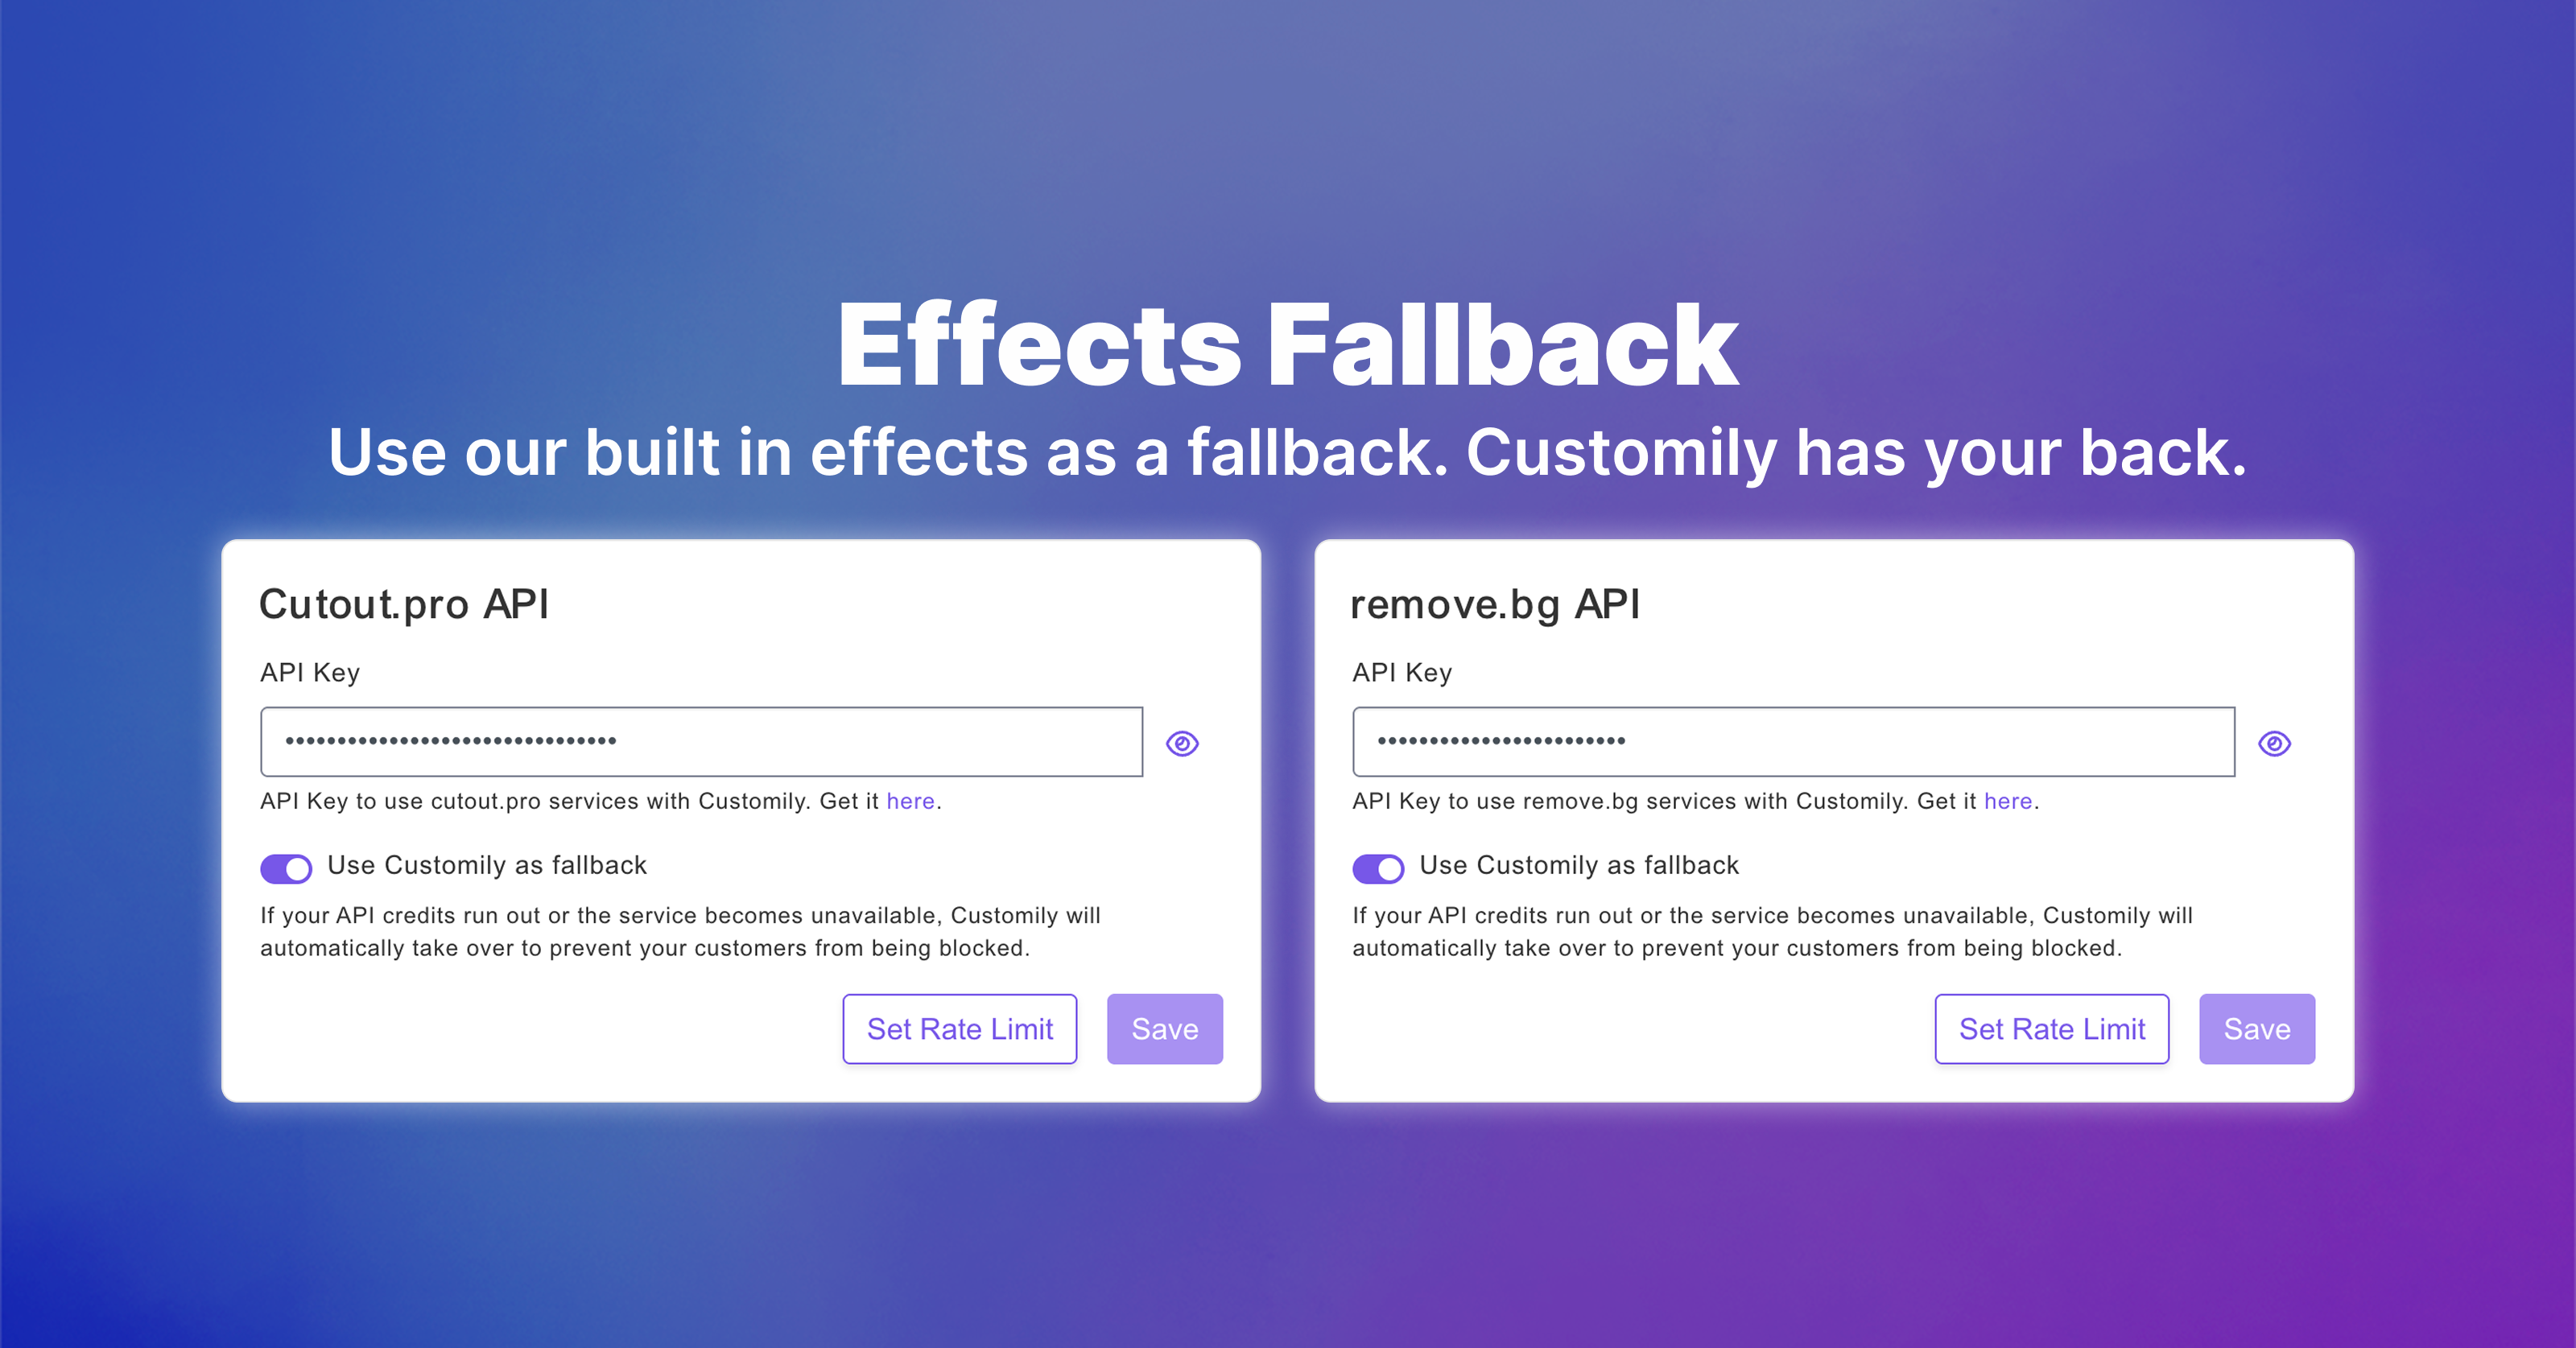
We've added a built-in fallback for Face Cutout and Remove Background effects that use external APIs like Cutout.Pro and remove.bg.
If either service fails for any reason, Customily will automatically use its own built-in effects instead, at no additional cost.
To activate the Customily fallback, simply enable this option on the Integrations page of the app.
This is especially important during peak season, helping ensure shoppers can transform their images successfully and complete their purchases without being blocked by third-party service issues.
🗓️ Calendars 2.0: More Ways to Make It Yours
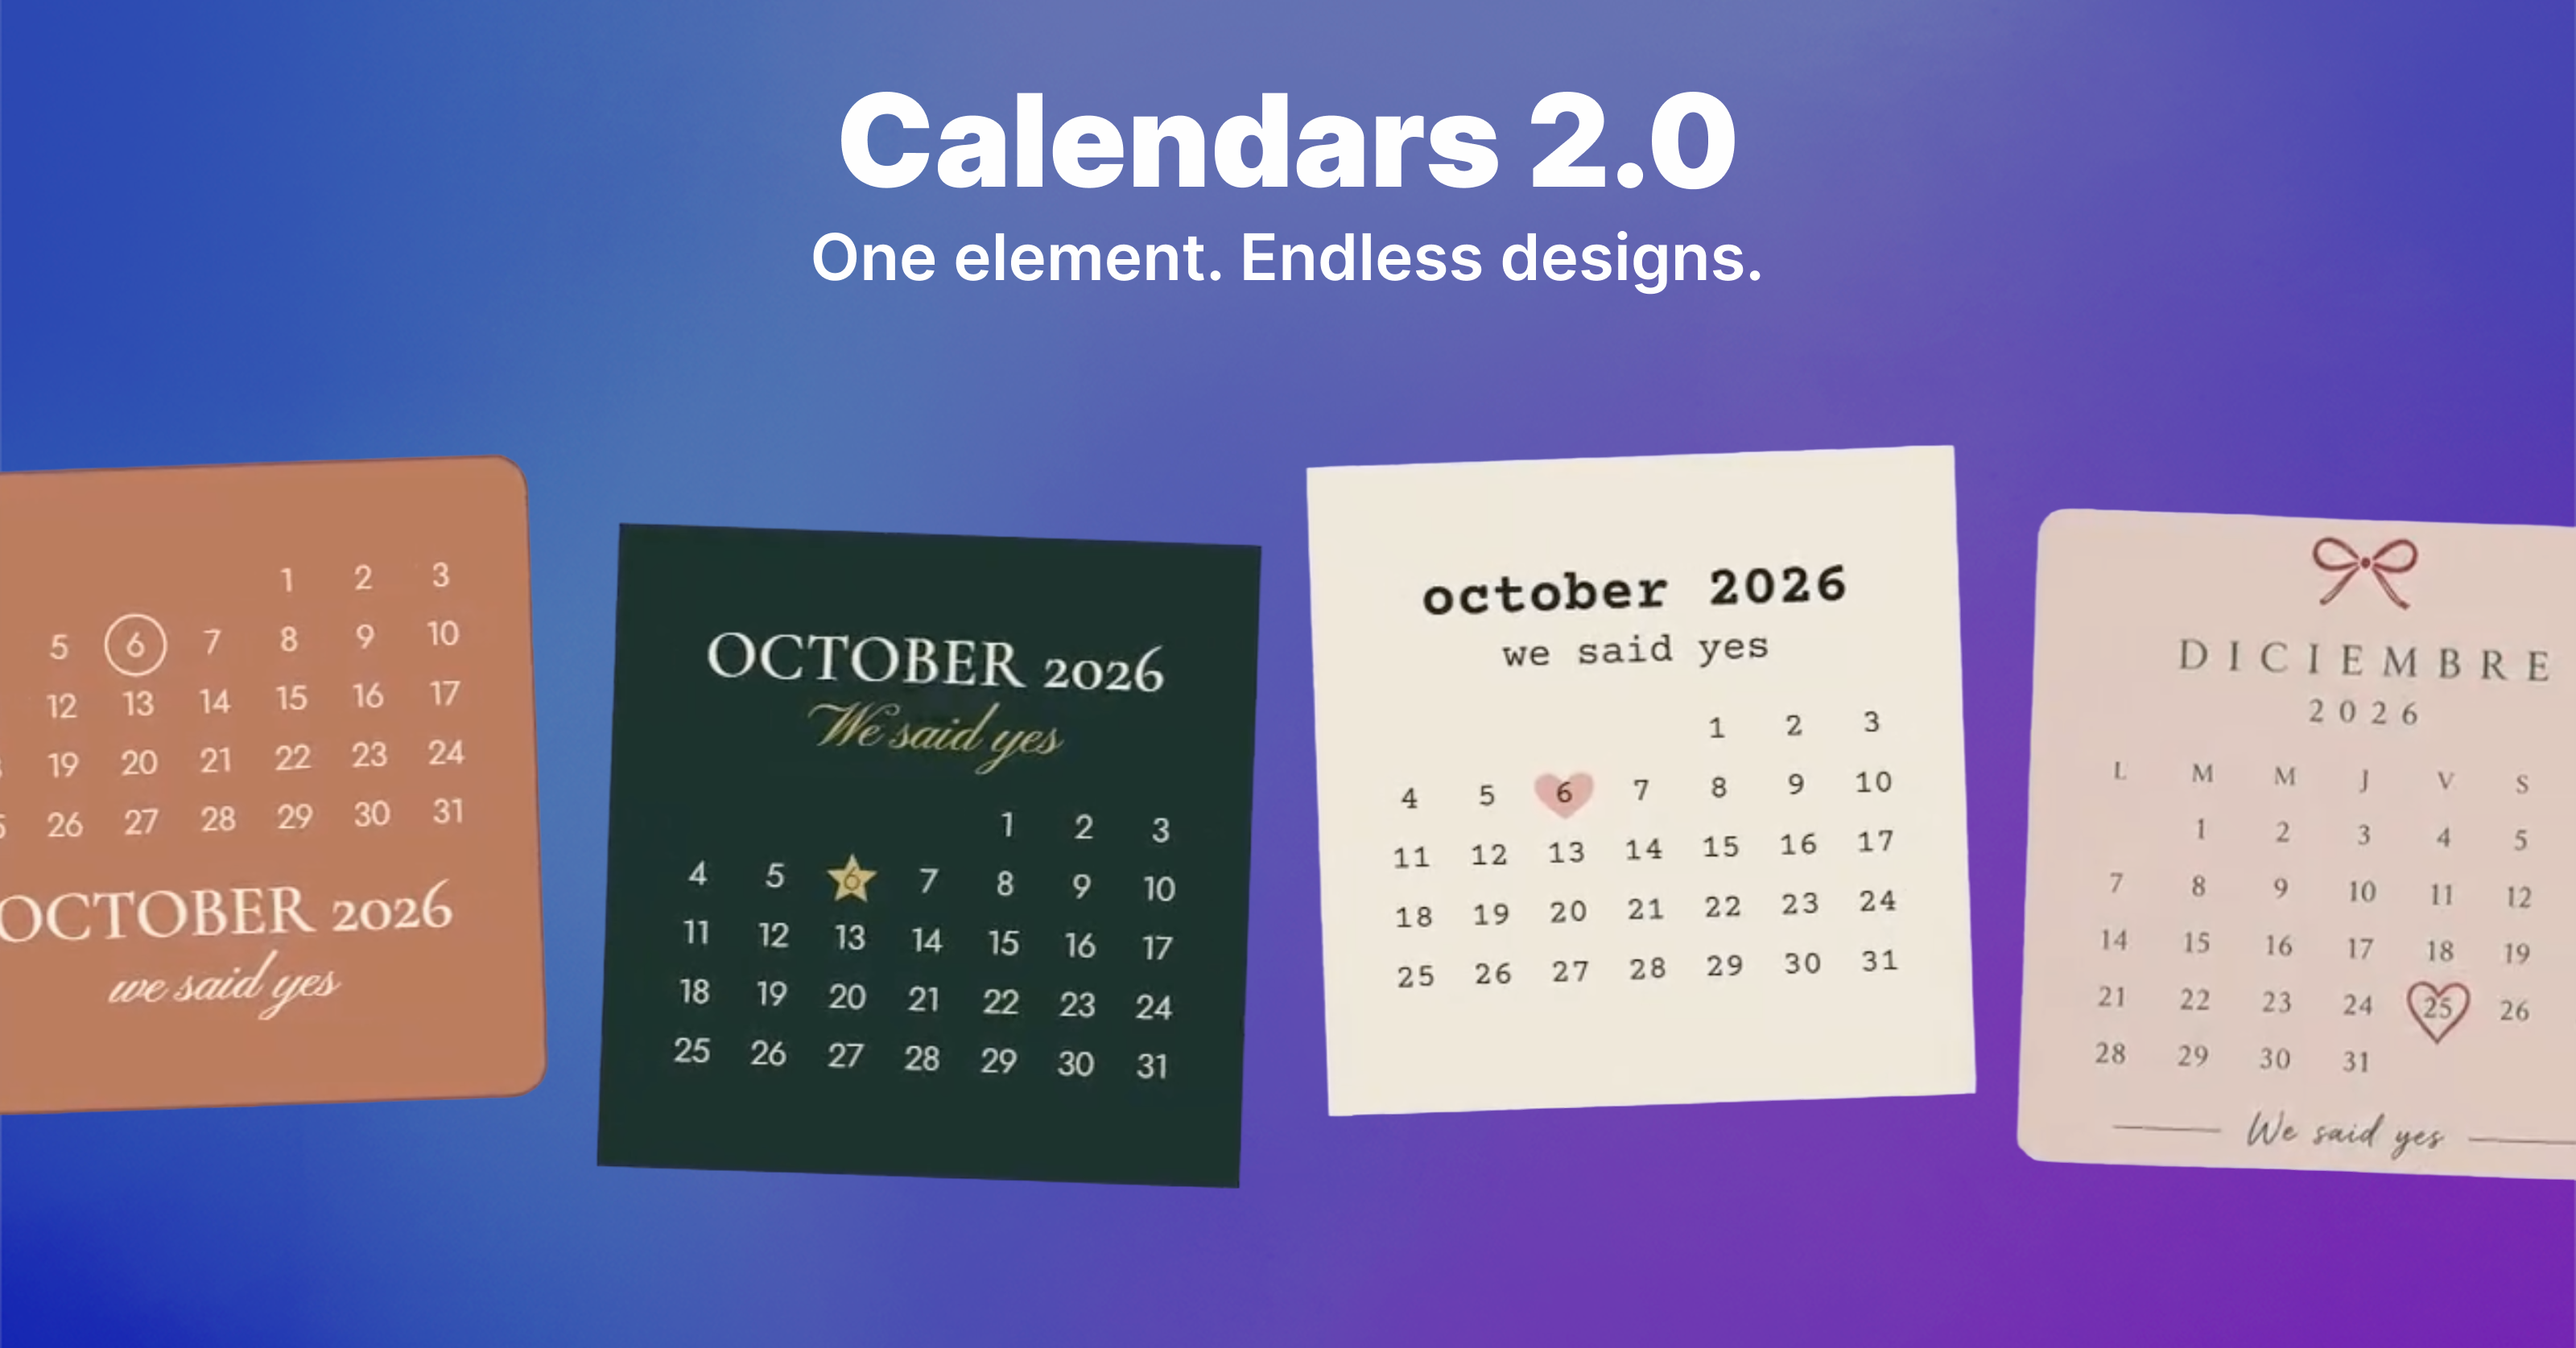
More customization. More control. More ways to make your calendars your own.
Our Calendars element just got a major upgrade! 🎉
With Calendars 2.0, you have much more control over how every part of your calendar looks and behaves.
Previously, you could mainly customize the font and colors of the entire calendar, with limited control over which elements were displayed or where they appeared.
Now, you can customize individual calendar elements and decide exactly how your calendar should look.
You can control settings for elements such as:
-
Month and year
-
Day numbers
-
Day initials
-
Divider lines
-
Backgrounds
-
And more
Each element comes with its own customization options, including colors, fonts, backgrounds, margins, alignment, and other styling settings.
Whether you want a clean and minimal calendar, a bold and colorful design, or something completely unique, Calendars 2.0 gives you the flexibility to build it your way.
Check out the video below for a few examples of what you can create with the new Calendars setup!
YouTube video
Introducing the New Color Picker 🎨
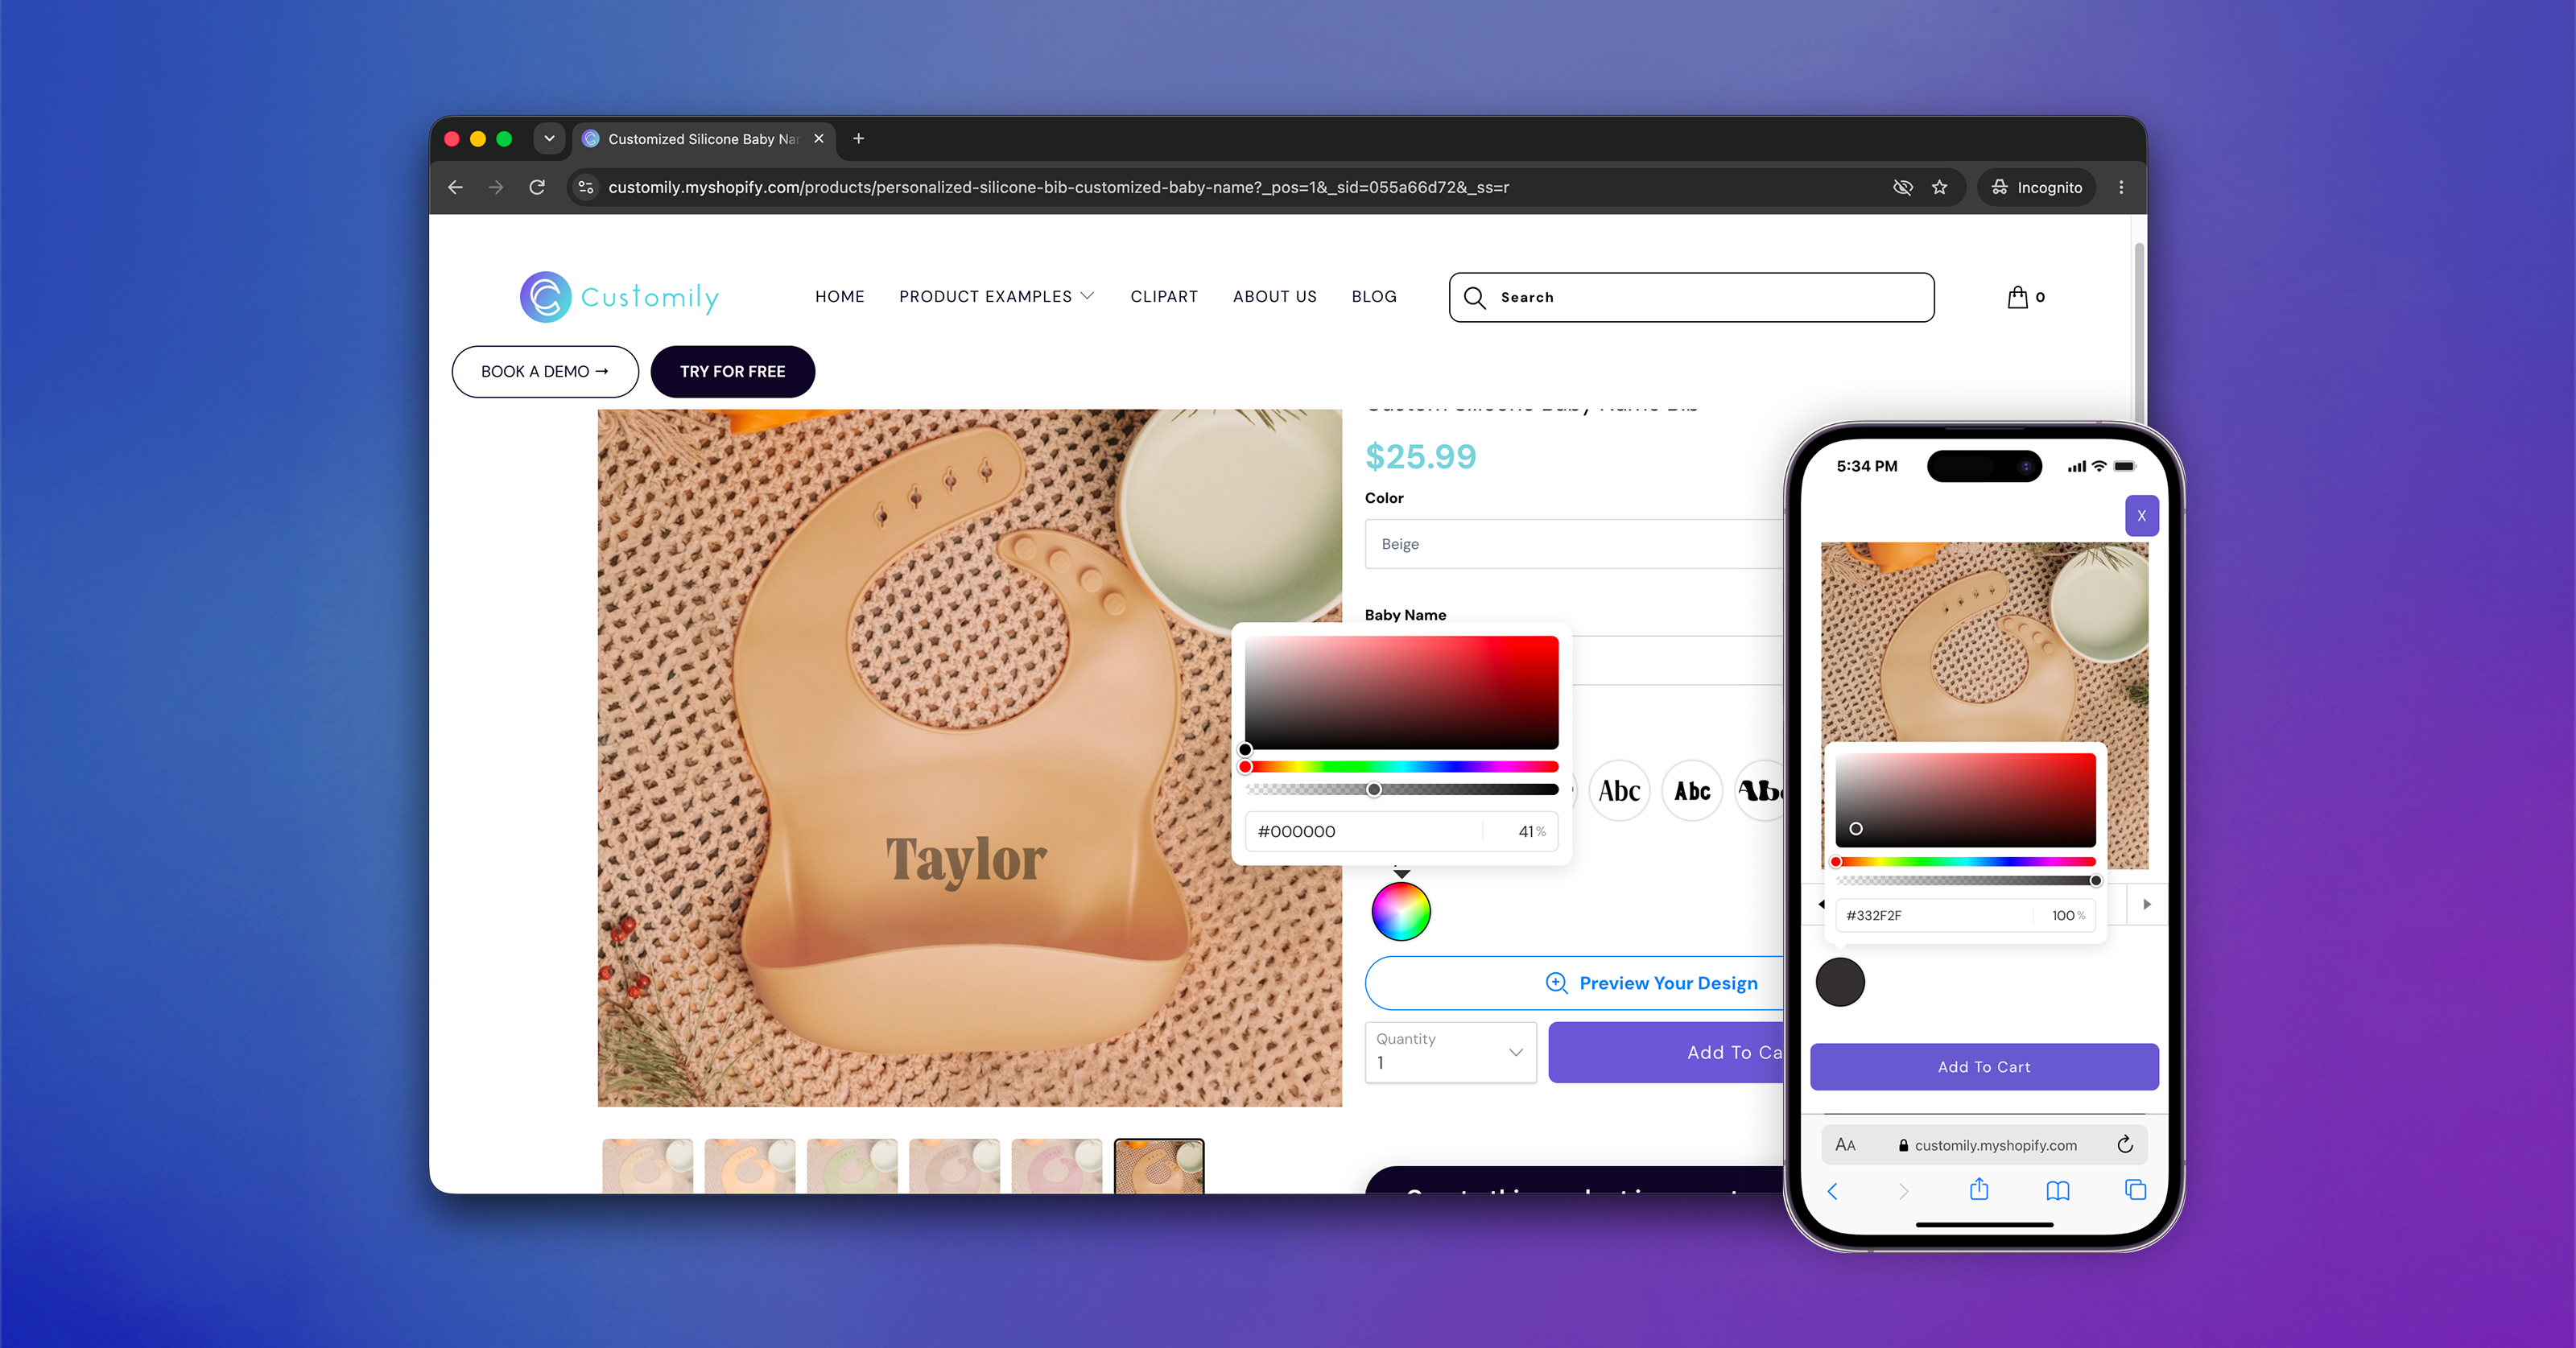
We've launched a new color picker experience, bringing the classic color selection interface to both desktop and mobile!
What's new? The new Popover Picker provides a consistent color selection experience across devices, making it easier for customers to choose the exact colors they want when personalizing products.
How to enable it:
Switch between the two available color picker styles in Store Settings → Styles → Color Picker Styles:
-
Hue Slider + Presets: The previous experience, which offers a hue slider on desktop and preset color options on mobile.
-
Popover Picker: The new experience, featuring the classic color picker interface on both desktop and mobile.
The new picker is optional, so you can choose the experience that best fits your store and customers.
Simplify Text to Image Personalization
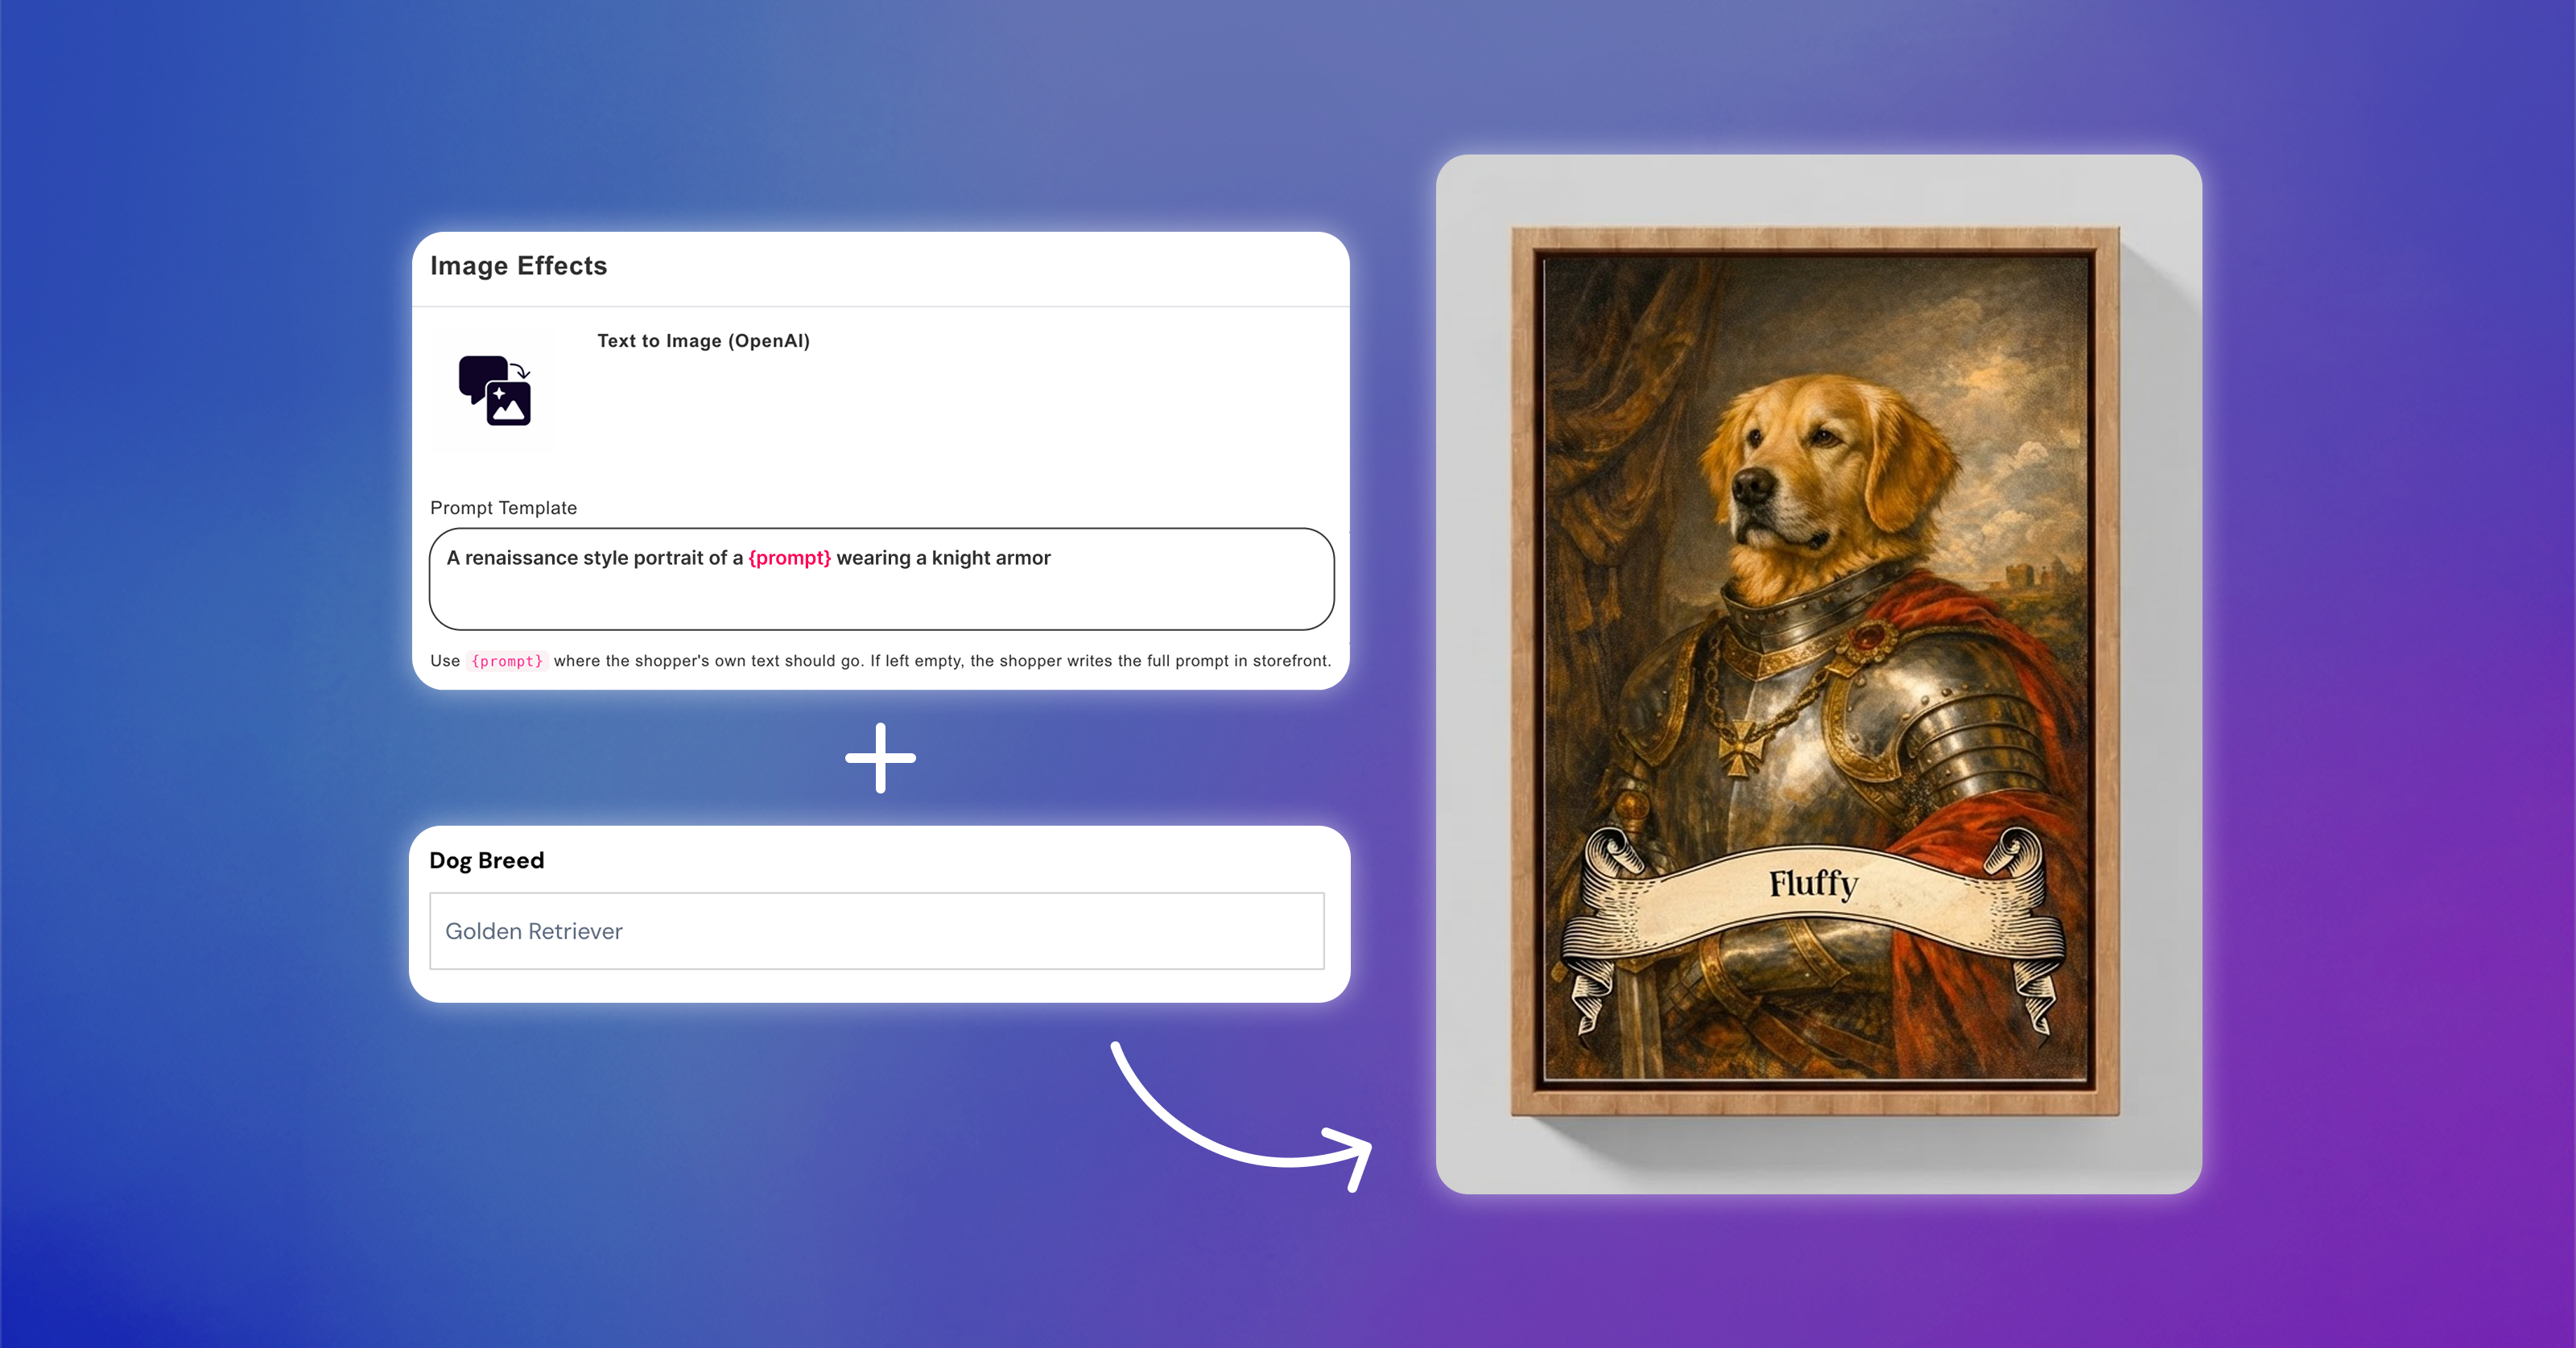
You can already use Text to Image effects on Image Placeholders to let shoppers create personalized images directly from your storefront.
Previously, shoppers had to write the entire prompt themselves, which made the experience quite open-ended and required them to know exactly what to ask for to get the desired result.
Now, store owners can set a predefined prompt directly on the Text to Image effect. You can use {prompt} to indicate where the shopper's input should be added, while keeping the rest of the instructions predefined.
This means shoppers only need to provide the specific detail they want to personalize, instead of writing a full, detailed prompt from scratch.
For example:
A renaissance-style portrait of a {prompt} wearing knight armor
Instead of asking the shopper to write something like “Create a renaissance-style portrait of a golden retriever wearing knight armor…”, they can simply enter “golden retriever”.
This gives store owners more control over the type of images being generated while making the personalization experience faster and easier for shoppers.
🎨 Copy & Paste Color Options Between Elements
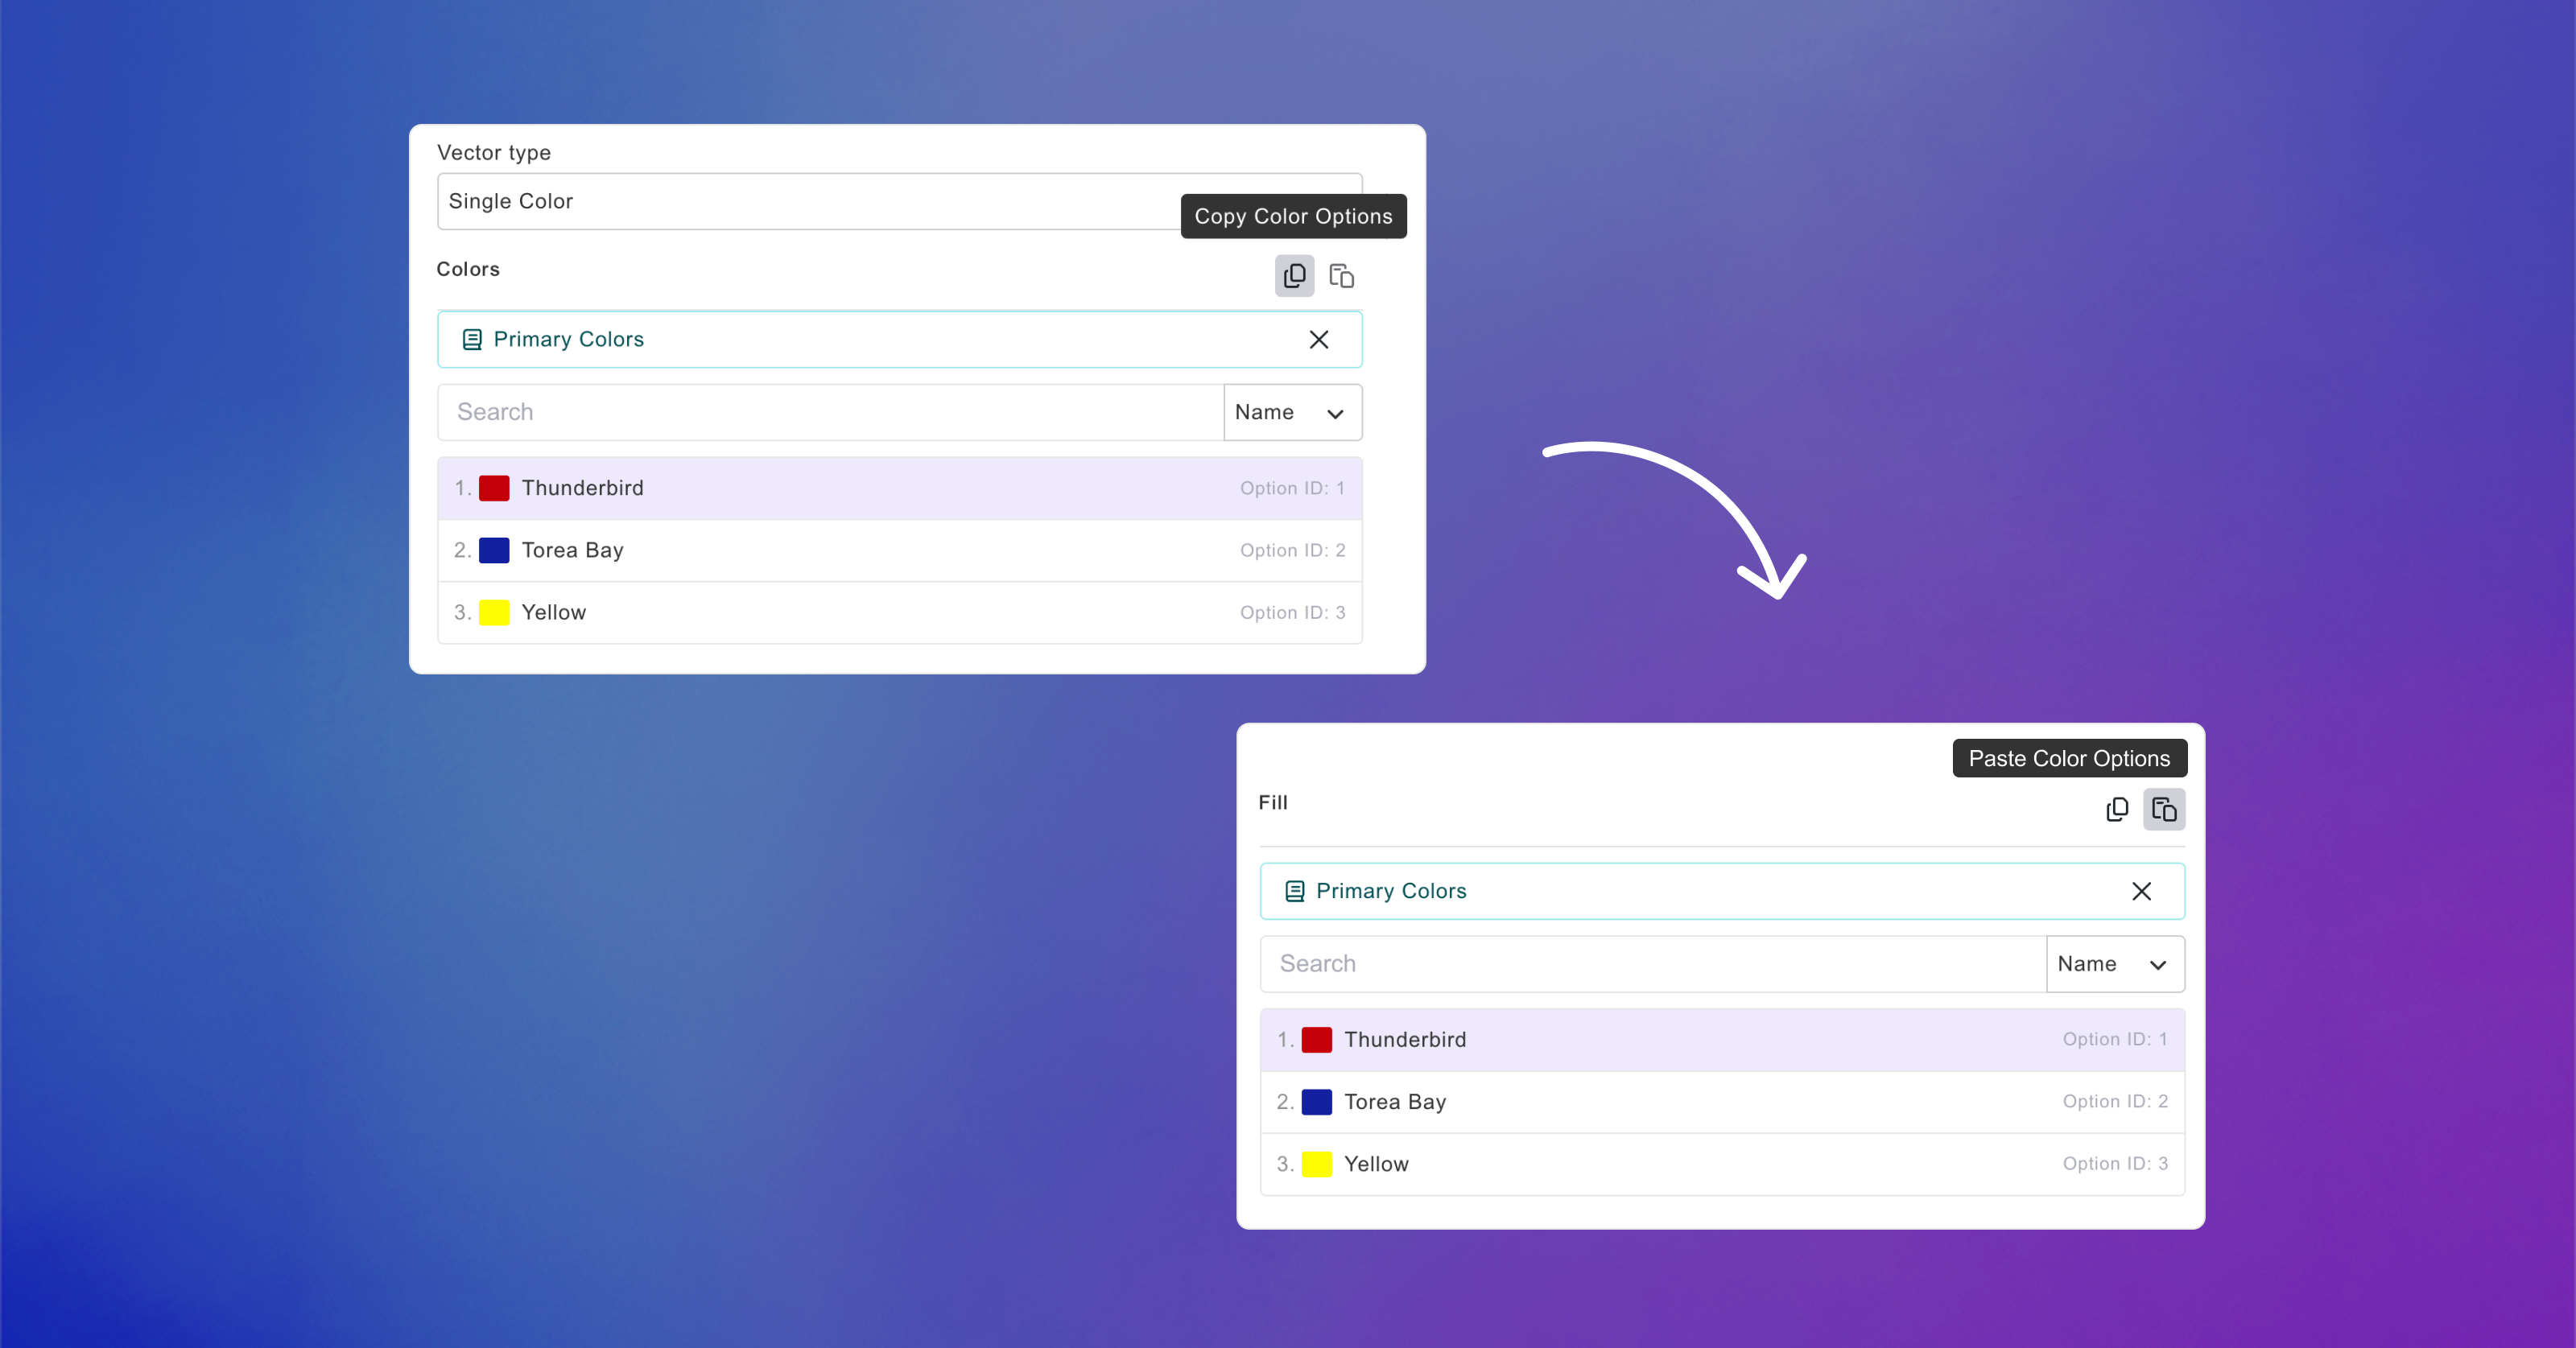
Updating colors across multiple elements just got a lot easier.
With Copy & Paste Color Options, you can now copy color settings from one element and paste them onto another, just like you already can with Dimensions & Positions.
This makes it easier to keep your designs consistent without having to manually set the same colors over and over again.
You can copy and paste color options between:
-
Text Fill, Stroke, and Shadow
-
Dynamic Vectors & Vector Placeholders with Single Color Options
-
Solid Backgrounds
Simply copy the color options from an element and paste them onto another supported element.
Section & Swatch Styles on Product-Level Settings
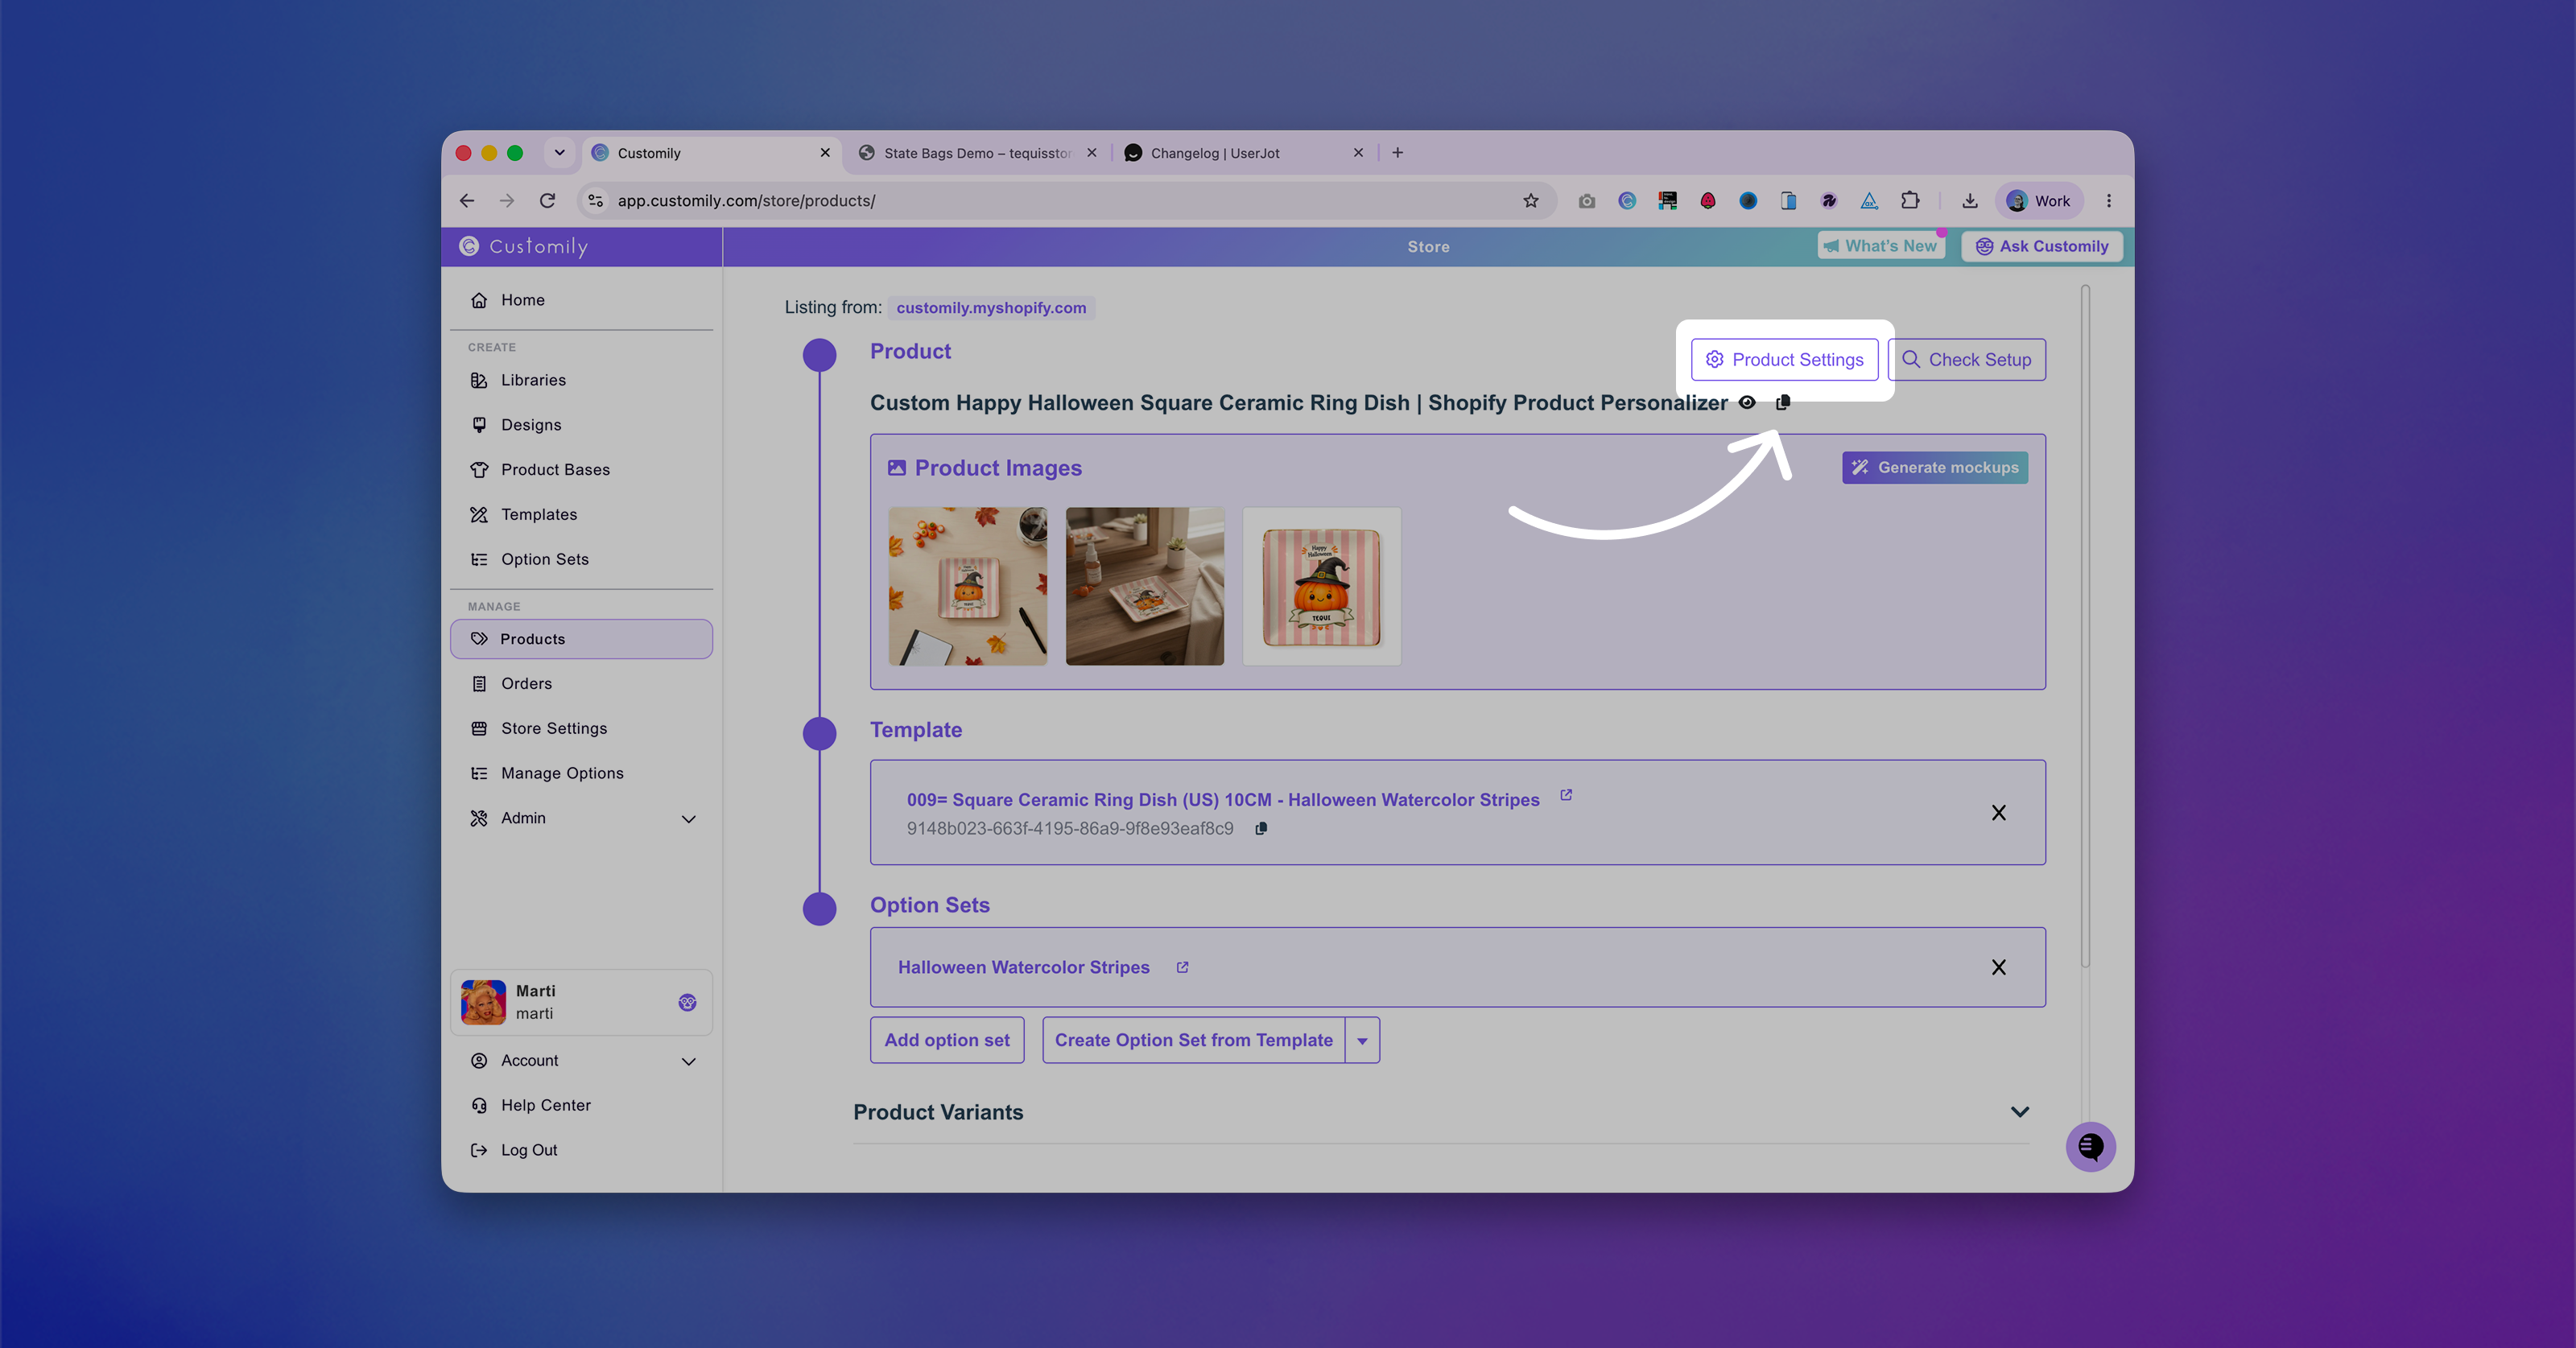
You can now customize Section Styles and Swatch Styles directly at the product level.
What’s new:
- Section Styles: Apply specific section styles to individual products, such as navigation buttons, accordions, and colors.
- Swatch & Text Swatch Styles: Apply your chosen swatch styles, including text swatches, to individual products.
Product-level settings give you more flexibility to customize your store without changing your global configuration. They’re especially useful for:
-
🧪 Testing different settings before applying them across your entire store.
-
🎯 Customizing specific products when you want certain products to have a different look or experience.
These new options make it easier to experiment, fine-tune your designs, and give specific products their own styling.
🪄 Image Reference for Image Effects

You can now add reference images to your Image Effects, alongside your written prompt, when generating images inside Image Placeholders.
Instead of describing every detail in your prompt, simply provide an image to show the AI the style, look, composition, or visual direction you have in mind.
What can you do with it?-
🎨 Replicate a visual style: without having to describe it in detail, use an existing image as a reference for the overall look and feel.
-
🔄 Recreate an image with specific changes: use a reference image and describe only what you want to change.
-
🖼️ Keep a consistent look across generations: use the same reference to guide multiple images toward a similar style.
Whether you want to transform an existing image, maintain a specific aesthetic, or make targeted changes, reference images give you more control over your generations.
🆕 Design Element: Text Along Path
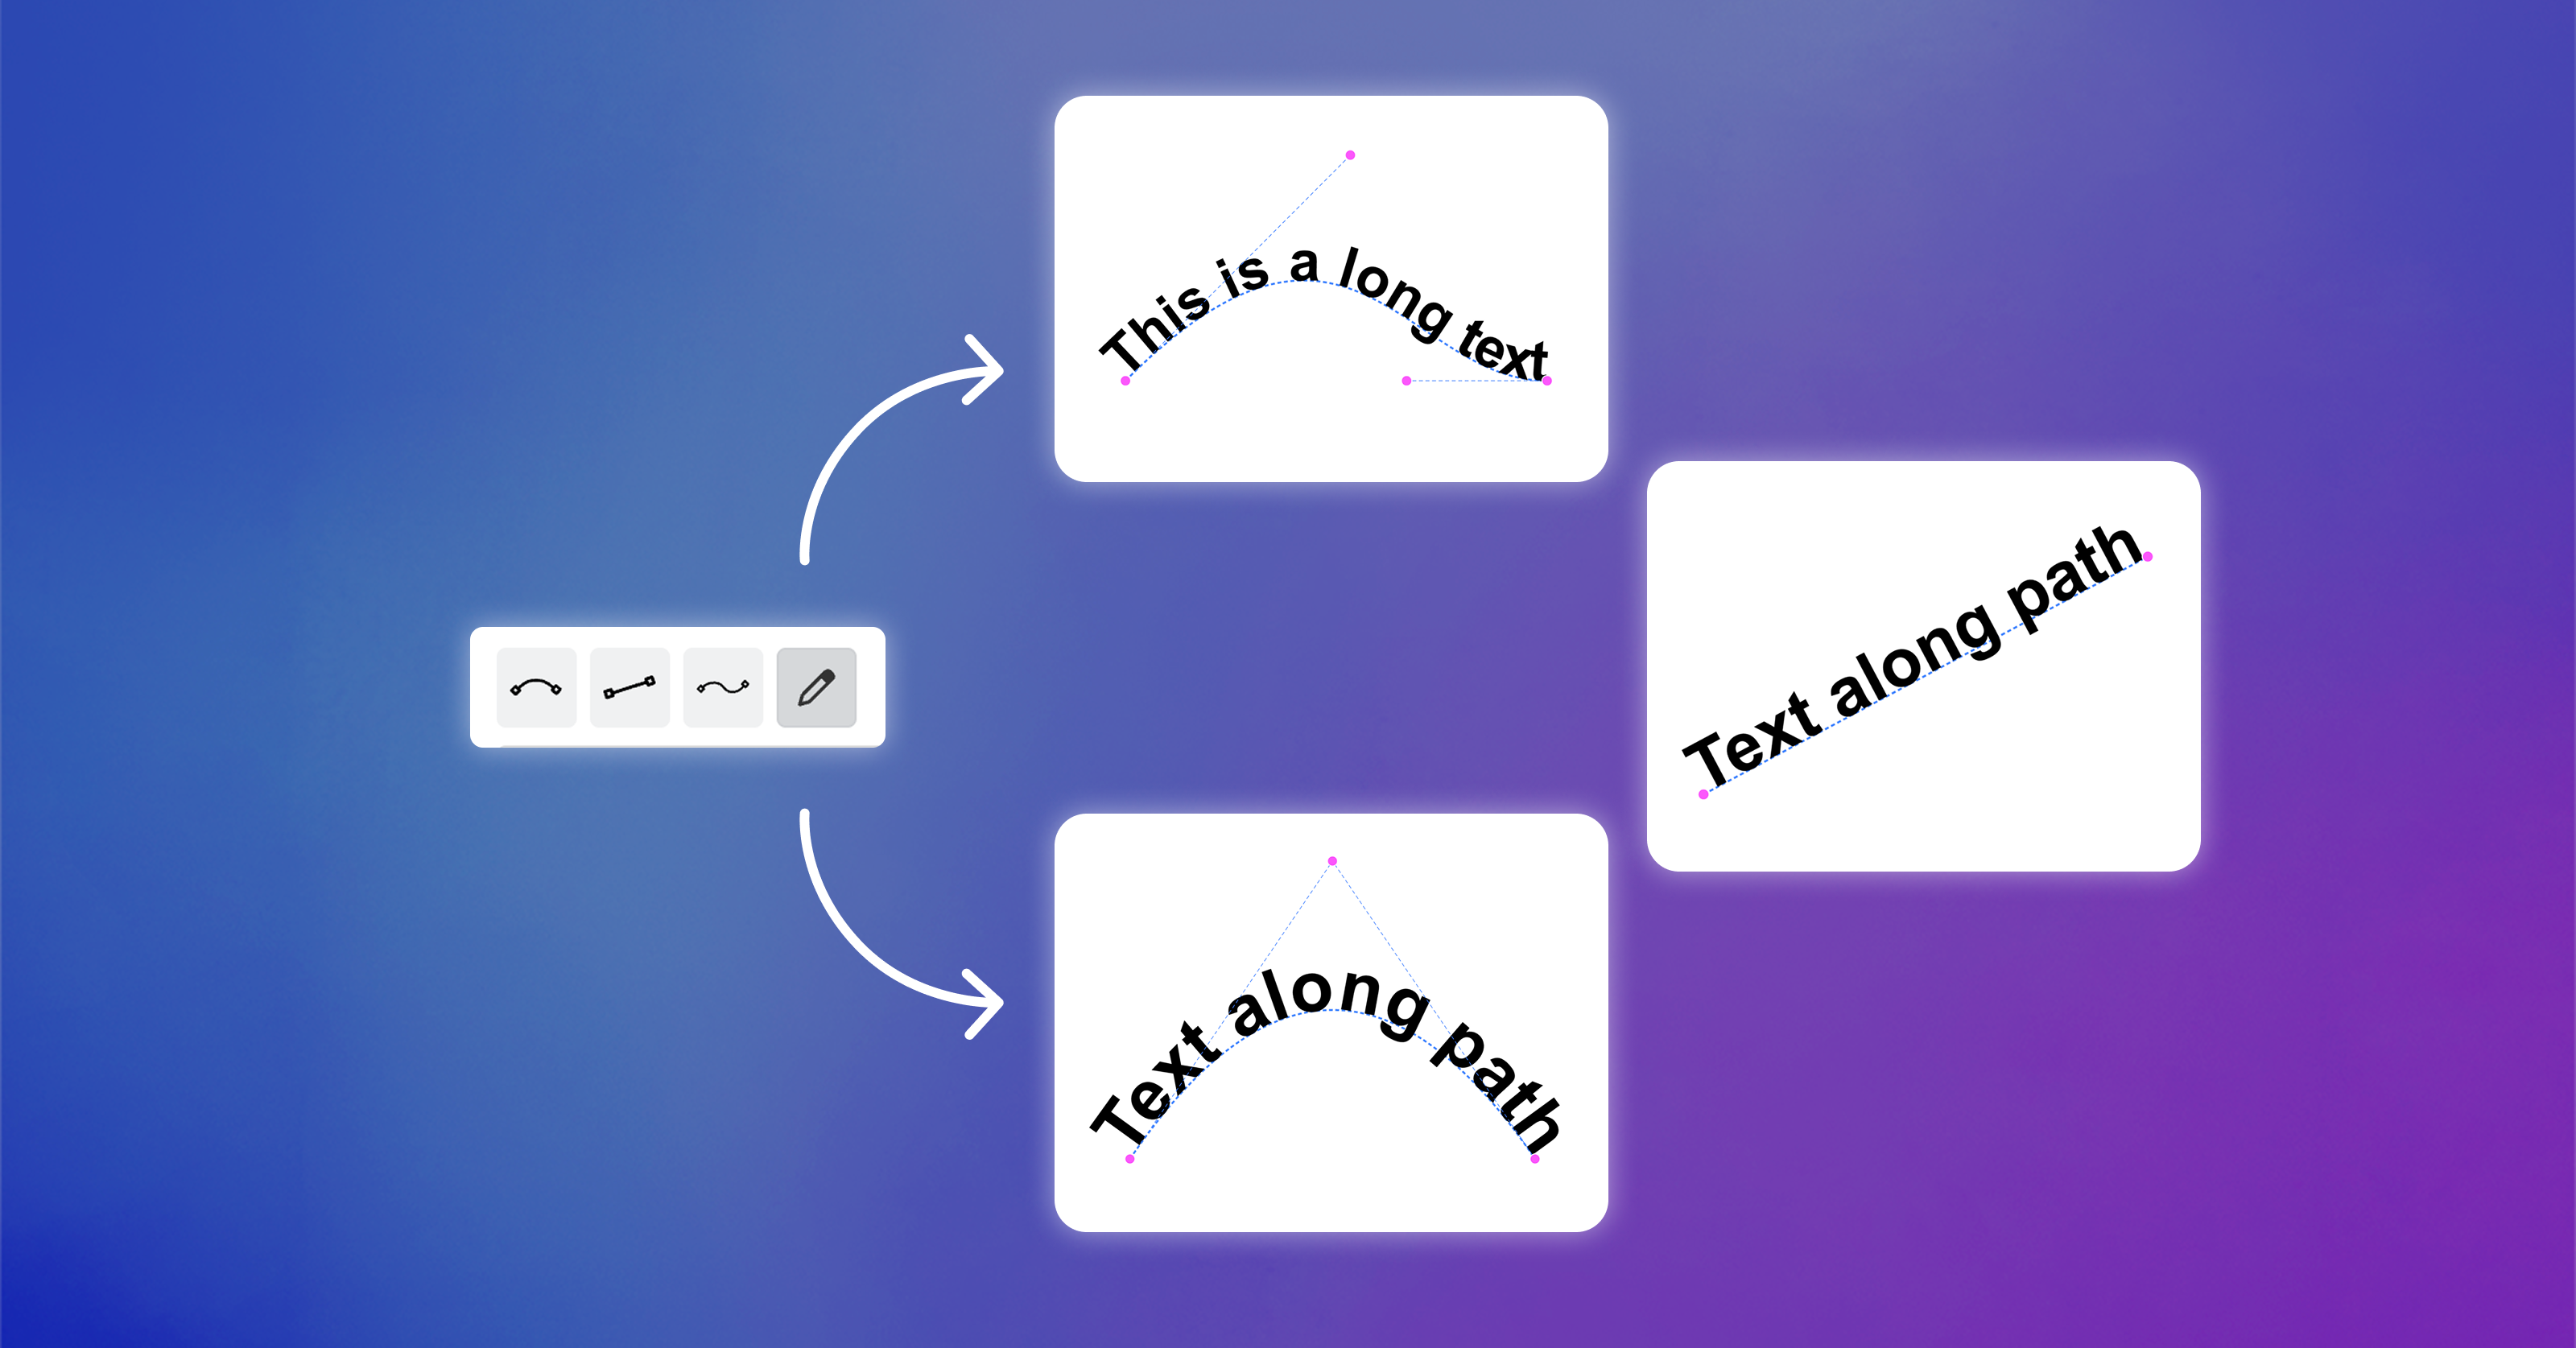
Create eye-catching text designs with our new Text Along Path element! ✨
Add text that follows a curve or custom shape, giving you more flexibility to create unique and creative designs.
How it worksChoose from one of our path presets, then customize the shape to fit your design. Simply enter your text and it will automatically adjust to fit the path.
You can also combine Text Along Path with:
-
Font Options
-
Colors Options
-
Stroke
-
Shadows
-
Text as Mask
A Better Way to Use Image Masks 🎭
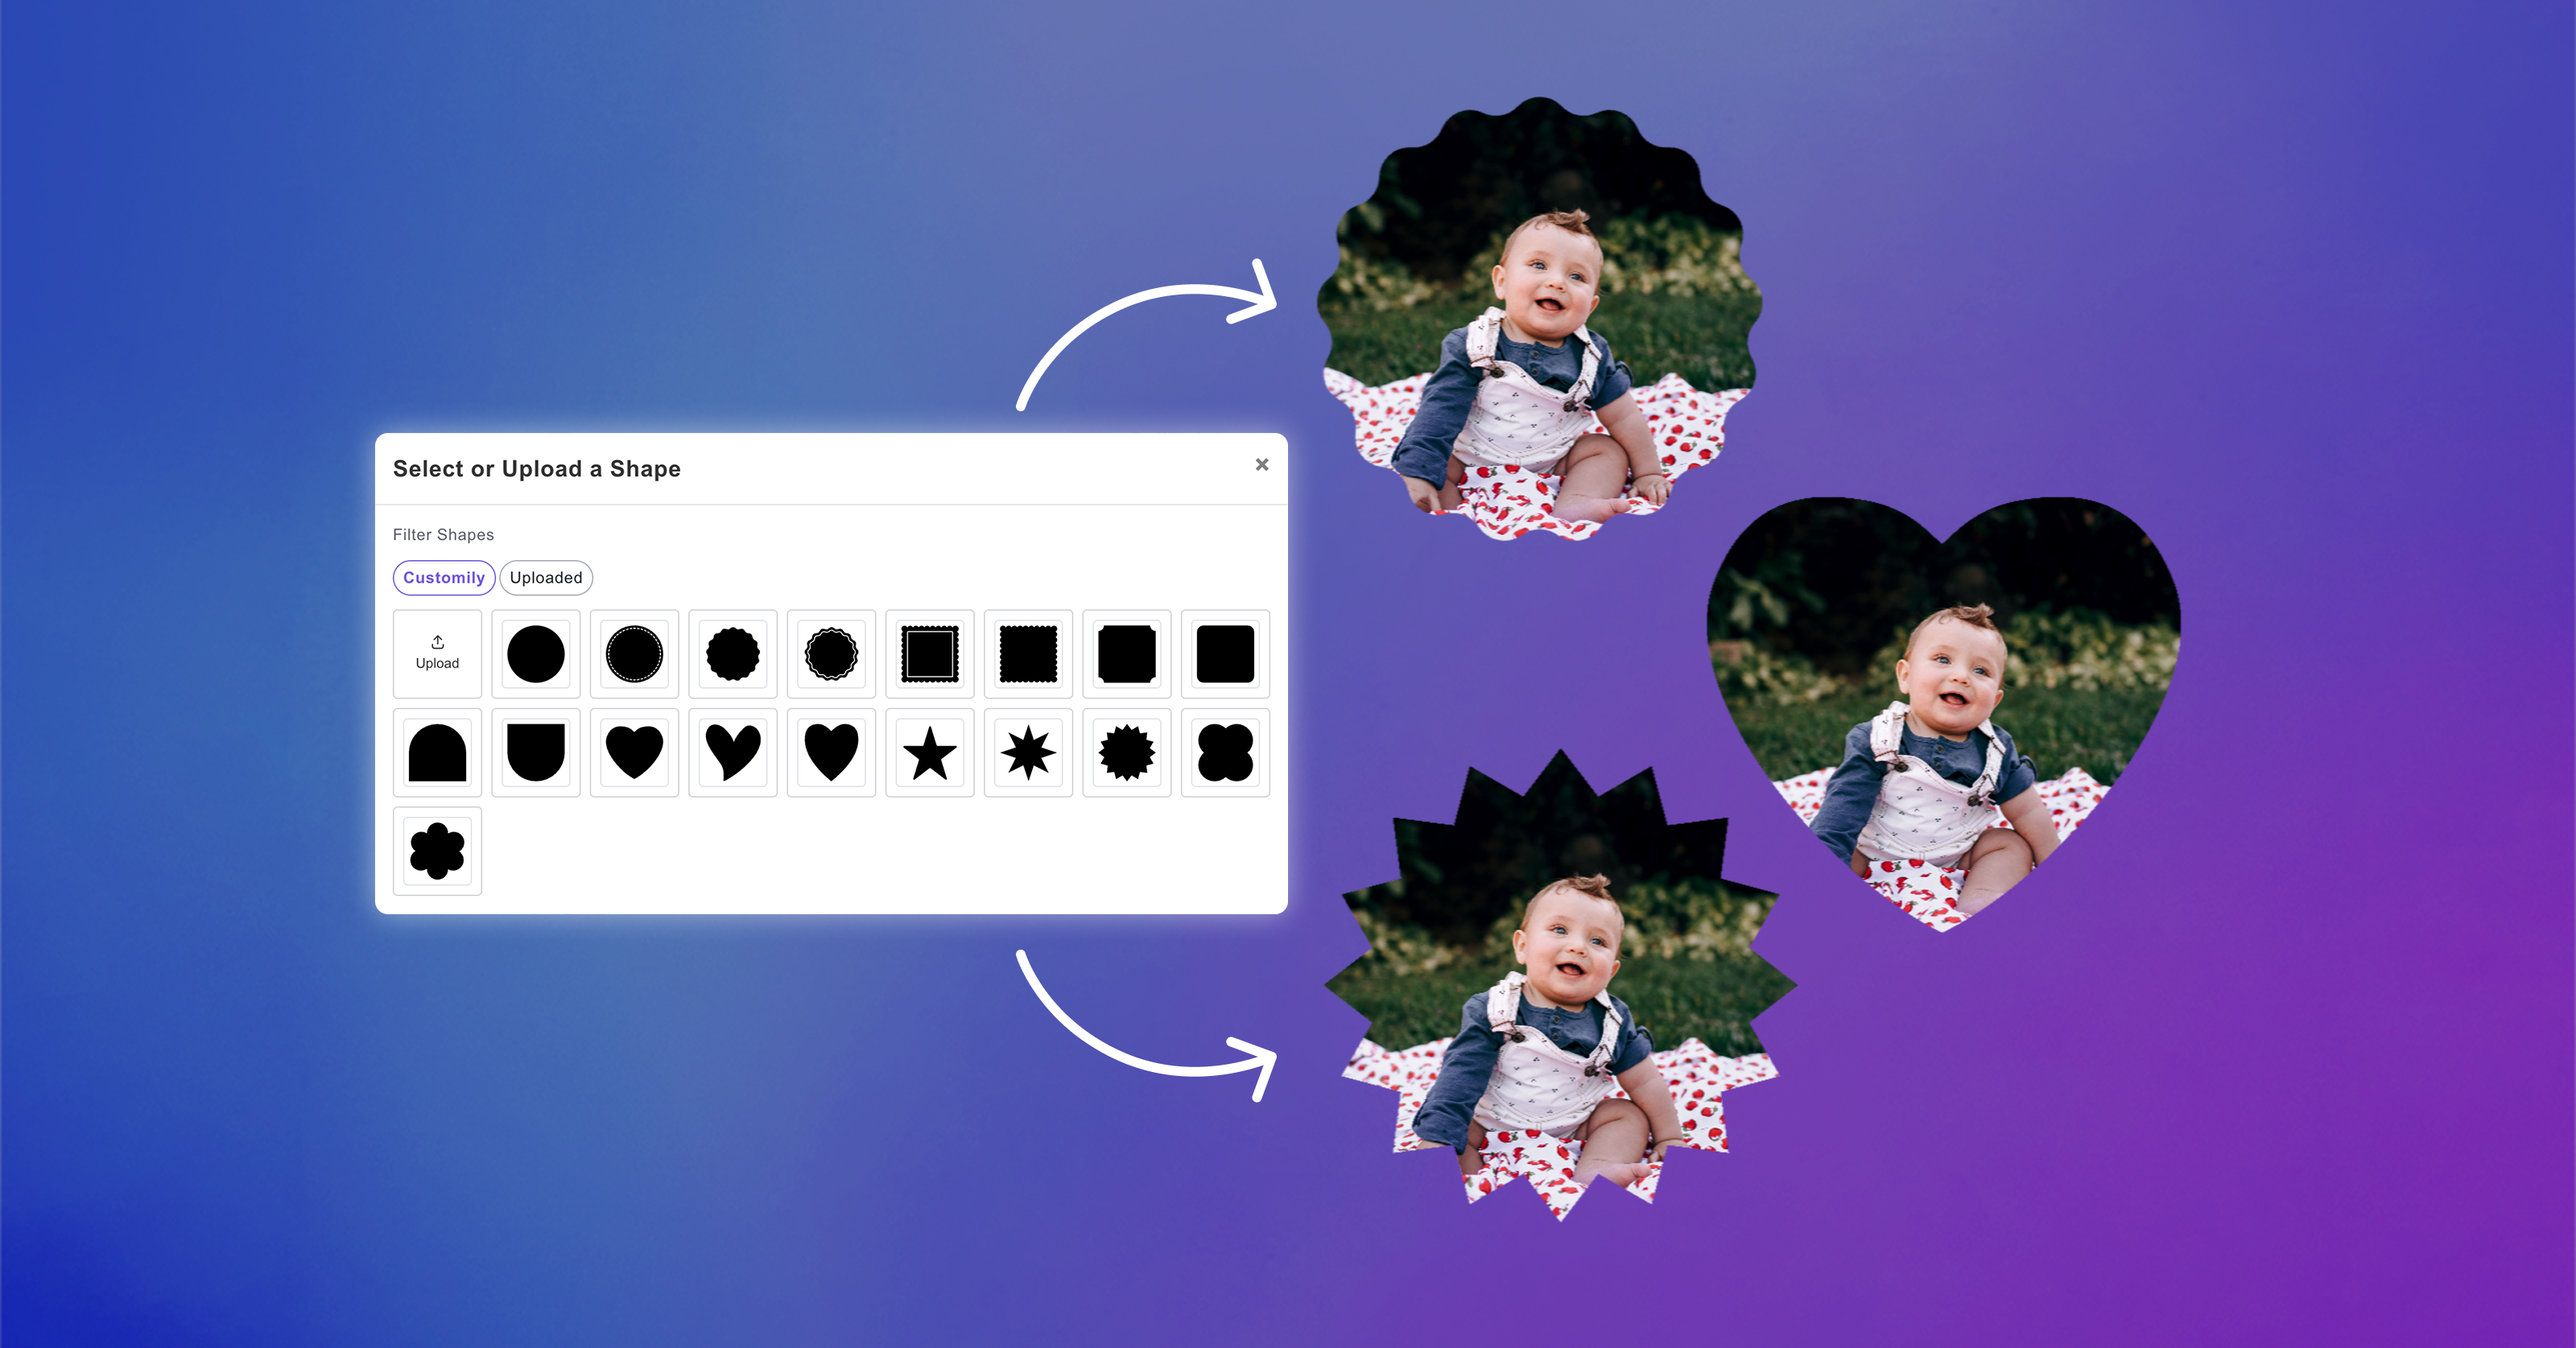
We’ve made a few improvements to Masks for Image Placeholders to make them easier and faster to use.
You can now:
- See the applied mask clearly: The UI now makes it obvious when an image placeholder has a mask applied.
-
Choose from pre-made shapes: Quickly apply shapes like circles, hearts, stars, and more as masks.
-
Reuse your own shapes: Uploaded mask shapes are now saved to your account, so you can easily reuse them across different image placeholders.
These updates make it quicker to create custom image shapes and reuse your favorite masks across your designs.